How to clear CMOS on ASUS PRIME B450M-A (and II) Motherboard: 2 Methods
Summary: This article explains how to perform a BIOS, or CMOS reset and clear the NVRAM on your ASUS PRIME B450M-A (or II) motherboard.
There are several possible causes for BIOS data corruption. Power outages, incorrect BIOS settings, hardware incompatibilities resulting from specific configurations, etc. Clearing CMOS to its original settings is a common solution in such circumstances to reset BIOS to factory defaults.
Somtimes it’s also recommend to clear CMOS and resetting BIOS before installing a new CPU on the ASUS PRIME B450M-A (II) motherboard.
There are 2 methods to clear CMOS and reset BIOS on the ASUS PRIME B450M-A (or II) motherboard:
No products found.
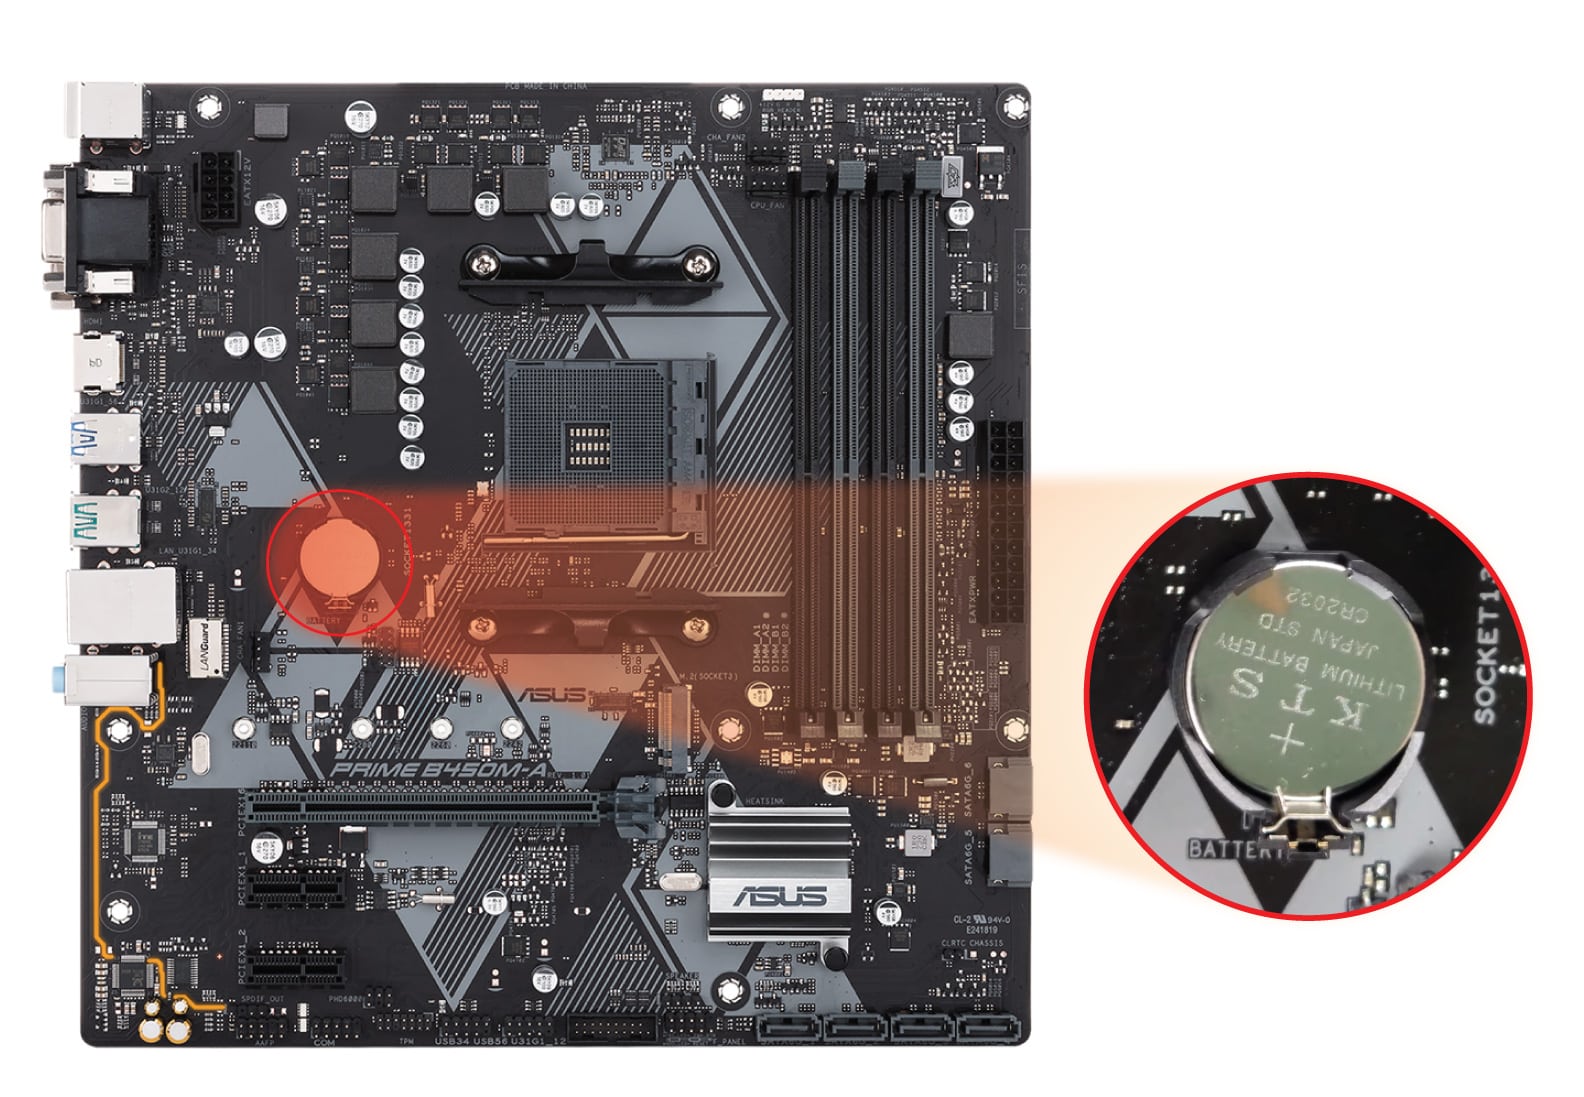
1. Reset Your CMOS by Re-seating the CMOS Battery
A battery is used to maintain settings in the motherboard. One way to clear CMOS on the ASUS PRIME B450M-A (II) motherboard is to remove and reseat the battery. Here’s how to do it:
- Turn off your computer and unplug the power cord.
- Press the power button multiple times to clear any charge in the PSU capacitors.
- Locate the 3V CR2032 battery, gently remove it from the holder, and wait a few minutes to ensure the CMOS is clear.

- Re-seat the battery into the holder.
- Plug in the power cord and turn on your computer.
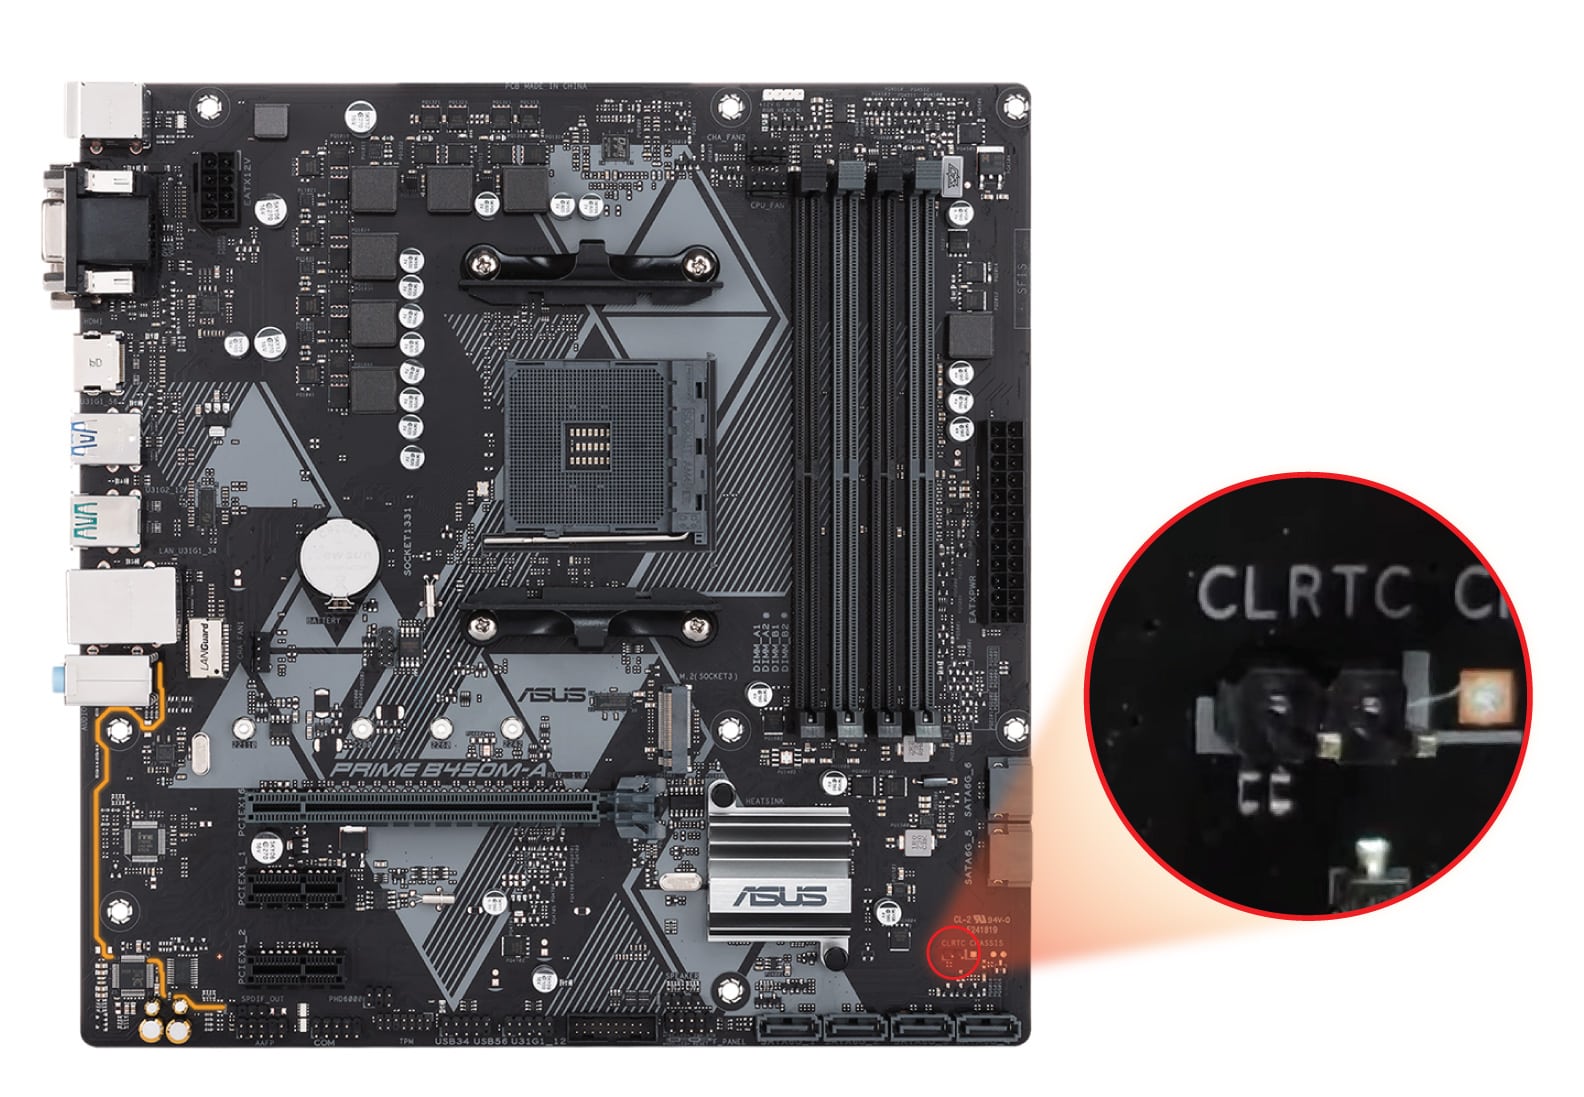
2. Reset Your CMOS with the Motherboard Jumper
The other way to clear CMOS on the ASUS PRIME B450M-A (and II) motherboard is to use the jumper. Here’s how to do it:
- Turn off your computer and unplug the power cord.
- Press the power button multiple times to clear any charge in the PSU capacitors.
- Locate the jumper with the label CLRTC next to it.
- Use a metal object like a screwdriver or a jumper cap to connect the two pins. Hold it for about 5-10 seconds. Release or remove the jumper cap.
- Plug in the power cord and turn on your computer.
I hope you find this guide helpful.
Take care.
|
Dominique D’Ozen Co-Founder / Editor email: [email protected] |