How to clear CMOS on GIGABYTE B450M DS3H (and V2/WiFi) Motherboard: 2 Methods
Summary: This article explains how to perform a BIOS, or CMOS reset and clear the NVRAM on your GIGABYTE B450M DS3H (or V2 or WiFi) motherboard.
There are several possible causes for BIOS data corruption. Power outages, incorrect BIOS settings, hardware incompatibilities resulting from specific configurations, etc. Clearing CMOS to its original settings is a common solution in such circumstances to reset BIOS to factory defaults.
Somtimes it’s also recommend to clear CMOS and resetting BIOS before installing a new CPU on the GIGABYTE B450M DS3H (or V2/WiFi) motherboard.
There are 2 methods to clear CMOS and reset BIOS on the GIGABYTE B450M DS3H (V2/WiFi) motherboard:
No products found.
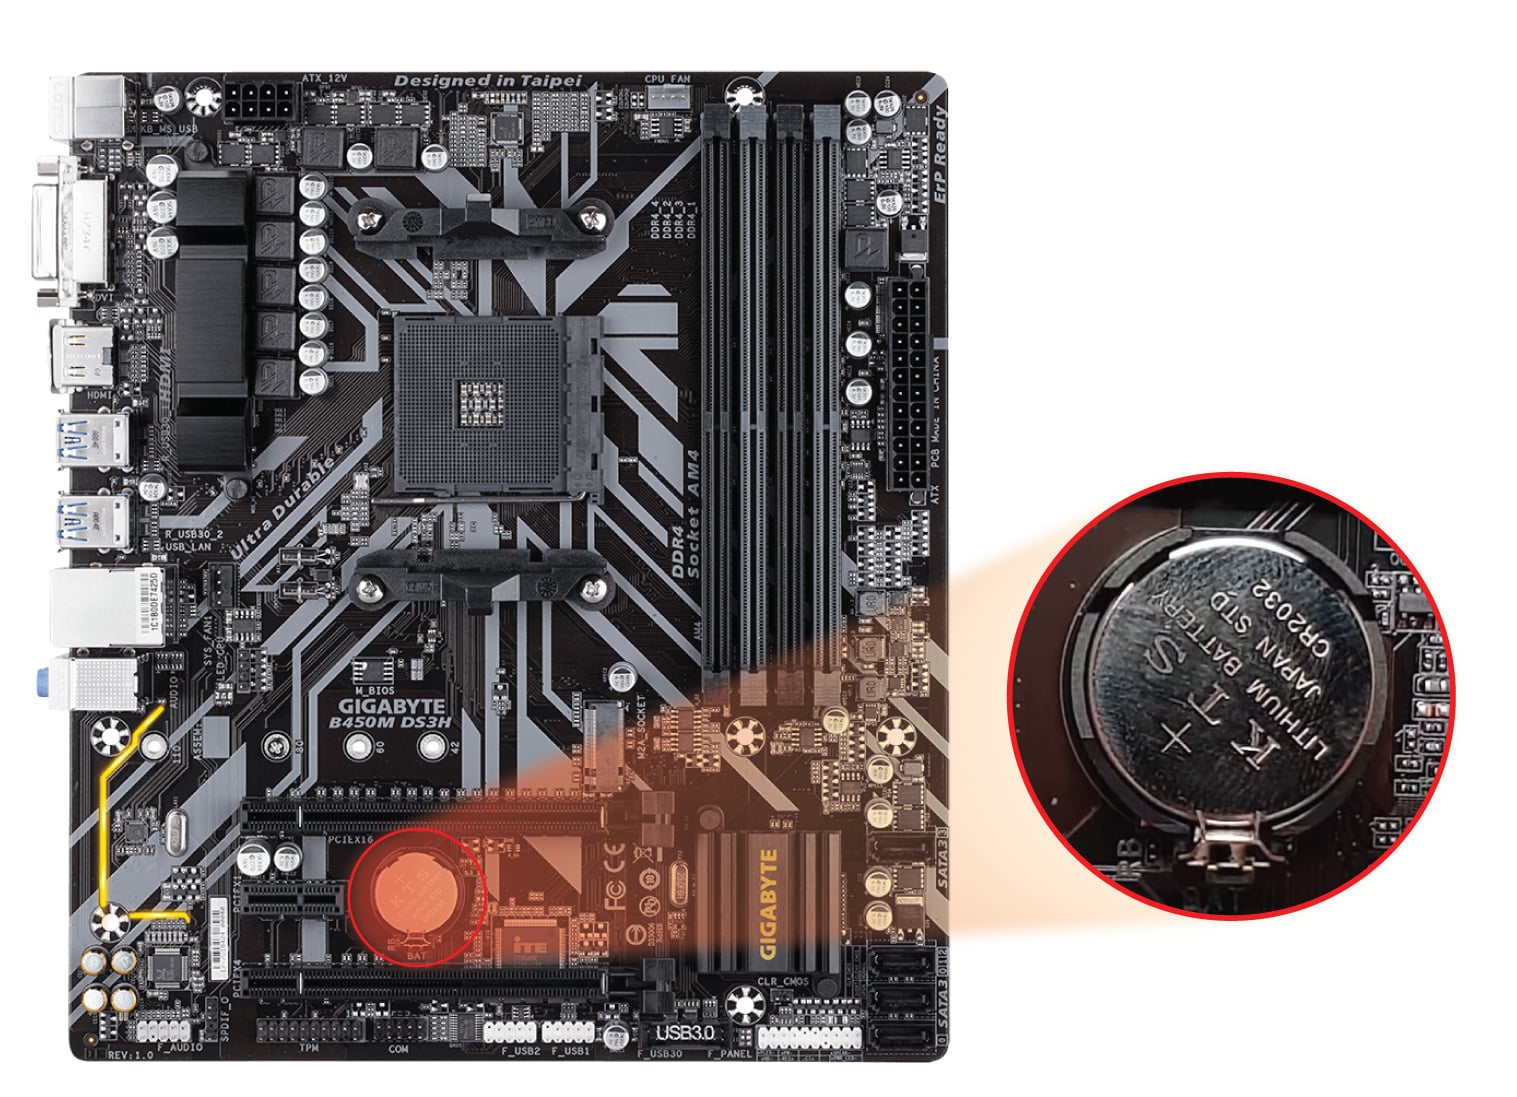
1. Reset Your CMOS by Re-seating the CMOS Battery
A battery is used to maintain settings in the motherboard. One way to clear CMOS on the GIGABYTE B450M DS3H (V2/WiFi) motherboard is to remove and reseat the battery. Here’s how to do it:
- Turn off your computer and unplug the power cord.
- Press the power button multiple times to clear any charge in the PSU capacitors.
- Locate the 3V CR2032 battery, gently remove it from the holder, and wait a few minutes to ensure the CMOS is clear.

- Re-seat the battery into the holder.
- Plug in the power cord and turn on your computer.
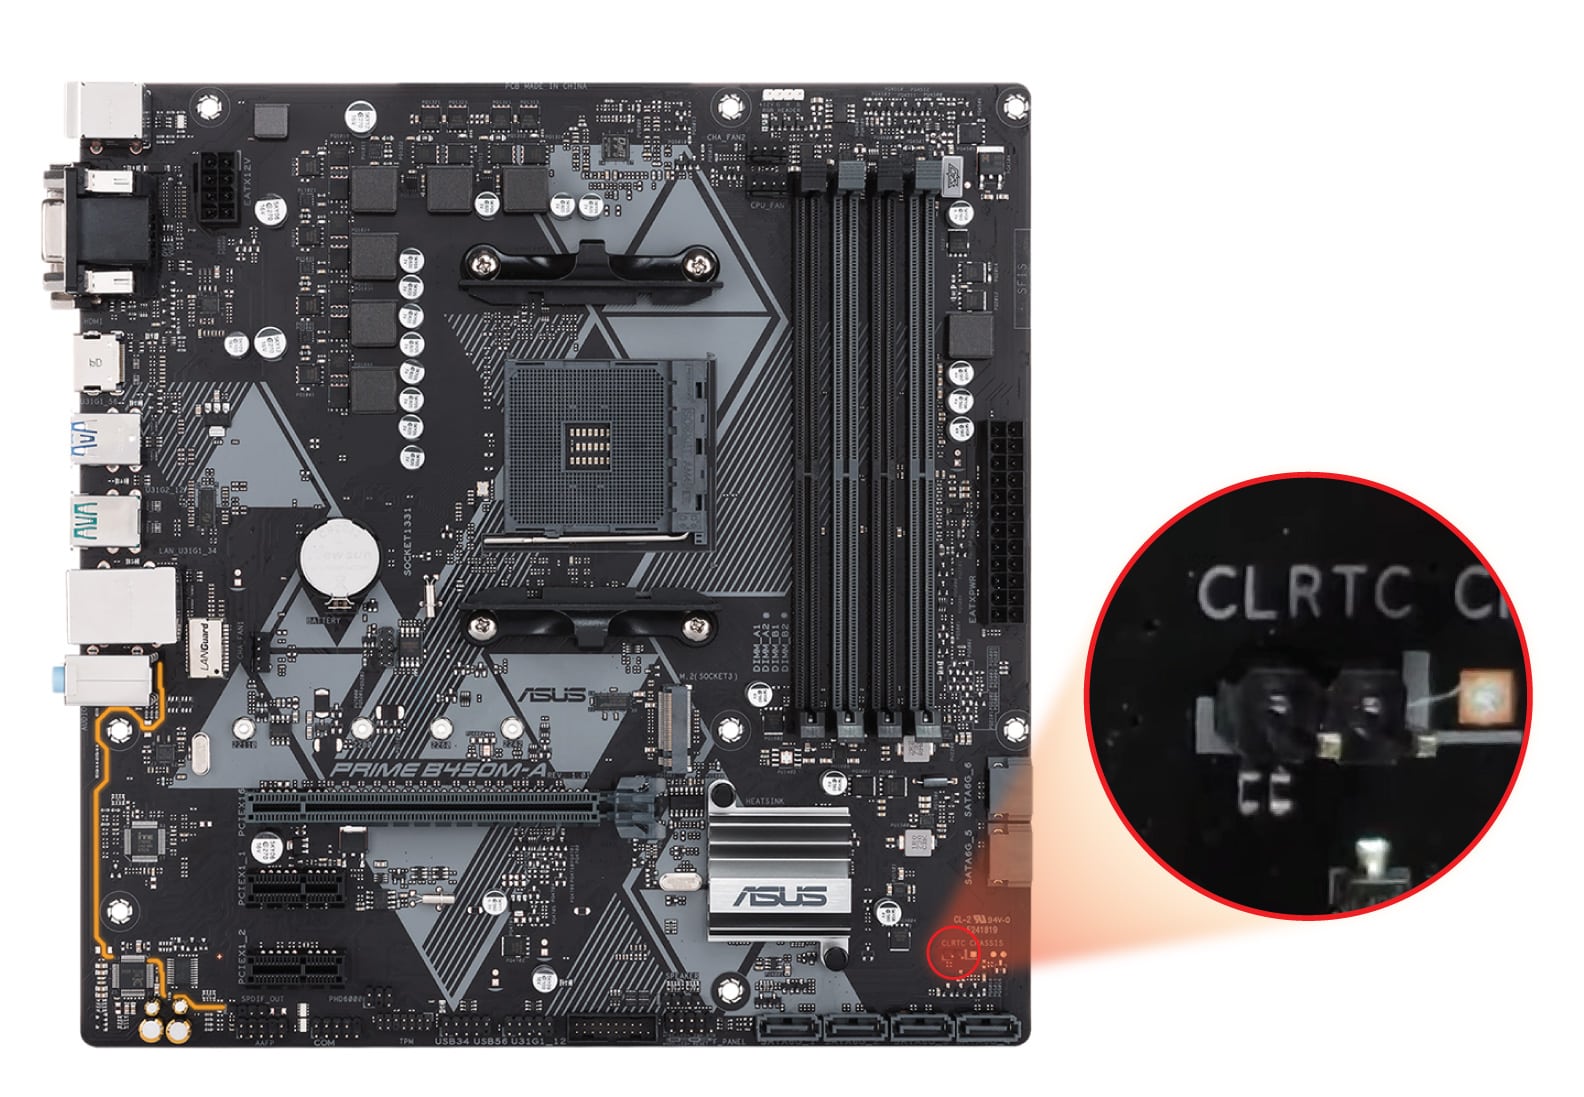
2. Reset Your CMOS with the Motherboard Jumper
The other way to clear CMOS on the GIGABYTE B450M DS3H (V2/WiFi) motherboard is to use the jumper. Here’s how to do it:
- Turn off your computer and unplug the power cord.
- Press the power button multiple times to clear any charge in the PSU capacitors.
- Locate the jumper with the label CLR_CMOS next to it.

- Use a metal object like a screwdriver or a jumper cap to connect the two pins. Hold it for about 5-10 seconds. Release or remove the jumper cap.
- Plug in the power cord and turn on your computer.
I hope you find this guide helpful.
Take care.
|
Dominique D’Ozen Co-Founder / Editor email: [email protected] |