How To: Boot Ubuntu 20.04 LTS Over Network PXE Using SERVA on Windows 7/8/10

Step by step tutorial how to boot and install Ubuntu 20.04 LTS over the network with PXE Server from other host machine running Windows 10. The software used is SERVA Community Edition.
One day I was having trouble finding an empty USB stick to install the Ubuntu operating system to my friend’s laptop. I was in a hurry with no stick and a computer that had no DVD drive, the only possible solution left was booting the Ubuntu Desktop 20.04 LTS via network PXE from my Windows 10 laptop.
I successfully configured a PXE server with a free community version of SERVA software on my Windows 10 laptop (host). The boot and installation of Ubuntu Desktop on the other laptop (client) went smoothly. For the server version of Ubuntu, the procedure is the same.
So here it goes …
Requirements
- Both host and client computers must be connected to the same network.
The easiest way to achieve this is to use your existing local network. So your existing (WiFi) router assigns the IP addresses, and Serva software is configured as DHCP Proxy.
The host machine where Serva is installed could be connected via WiFi. Although the wired connection is recommended. It’s faster. The client, however, must be connected via ethernet cable to the router. Obviously, it cannot connect to the WiFi before and during boot.
- Ubuntu ISO image
Head over to the official Ubuntu website and download the ubuntu-20.04-desktop-amd64.iso file. If you need a server version, just download that one, the procedure is the same.
- SERVA Free Comunity Edition
This is a fully working free version of PXE Server software for Windows. This is for non-commercial use only, please buy a license if you use it in a professional manner. Download it from here. At the time of writing, it’s the Serva_Community_v3.2.0.
Step By Step Tutorial
Serva: Extract files
You need to extract the Serva .zip file. It doesn’t matter where. You may create a new folder named “serva” on the Desktop and extract the .zip file into it.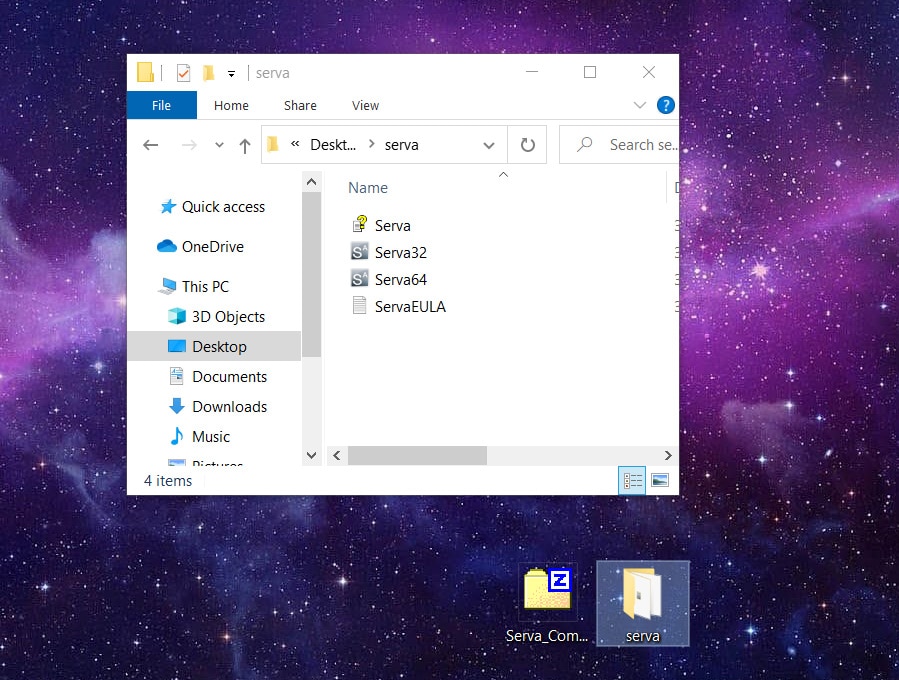
Serva: Create root folder
Create a root folder for Serva. The name and the location don’t matter, as you will point to it in the Serva settings in the next steps. For example, let’s create a folder directly on a C: drive, called “serva_root“.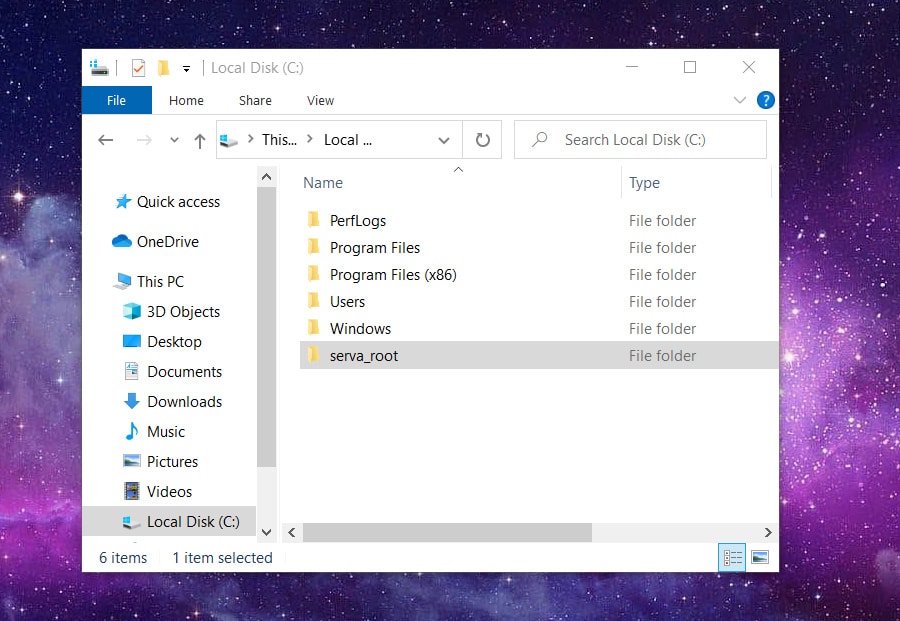
Serva: Run Serva
Run Serva64.exe (or Serva32.exe if you are on a 32-bit OS like Windows 7 32-bit). Wait for the countdown counter and click “I’m a “Community” user”. If your Windows Firewall is enabled, you get a warning. You need to ALLOW it. If you use some other 3rd party Firewall, you need to Allow Serva to access through it. Or you may just disable it for now.
Click on the icon on the top left corner and go to “Settings”.
Serva: TFTP Settings
Tick the TFTP Server box and make sure you set the Root directory to C:\serva_root folder, created previously. Leave the rest as default.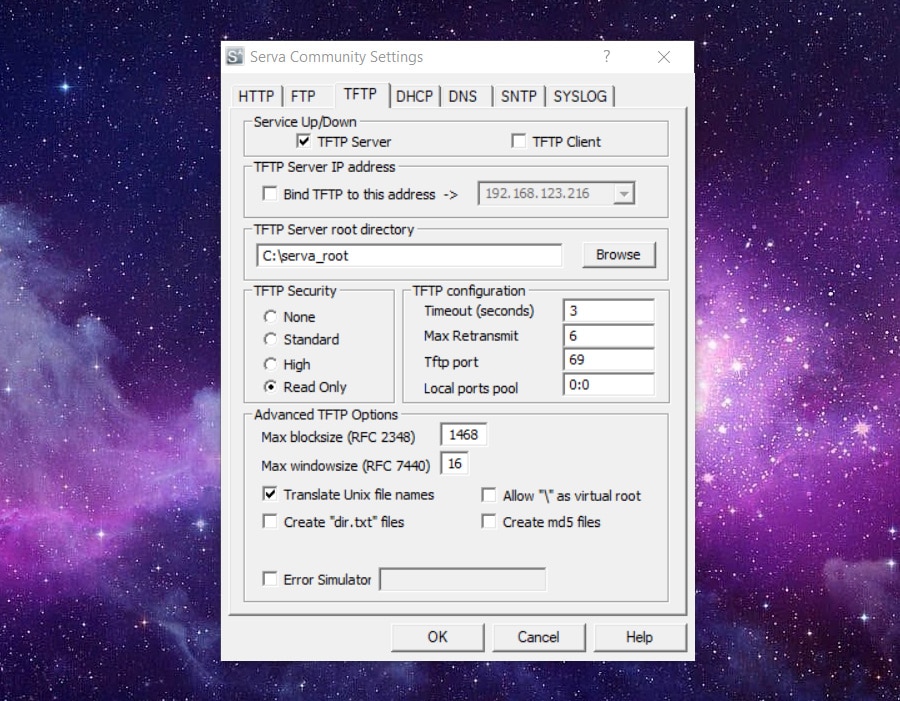
Serva: DHCP Settings
Move to the DHCP tab and tick proxyDHCP and BINL box. Leave the rest as default.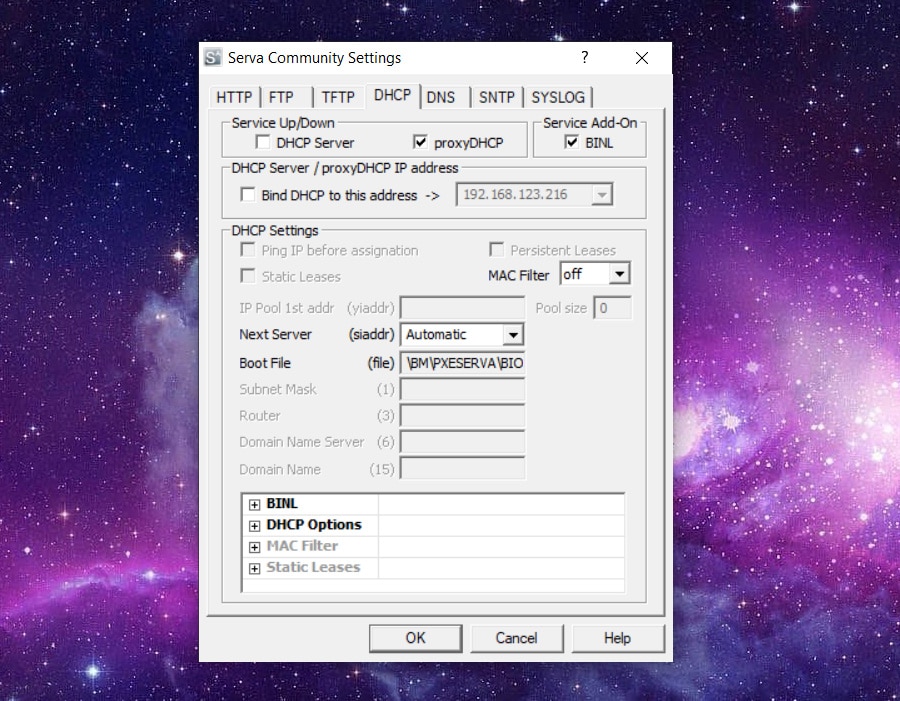
Serva: Quit and Re-run
Click OK, close Serva, and re-run it again. This is a must because only when Serva starts it generates all the necessary folders in the root folder. So if you make any changes to the folders under C:\serva_root, then you should always quit and re-run the application before a PXE boot.
Ubuntu ISO: Copy the Content
Inside the C:\serva_root\NWA_PXE create new folder ubuntu and copy all the content from the disk image ubuntu-20.04-desktop-amd64.iso into it. You can mount the .iso file with Windows Explorer (right-click on the file and select “Open With -> Windows Explorer). Or with any other tool.
File: ServaAsset.inf
Inside the C:\serva_root\NWA_PXE\ubuntu folder, create a new Text Document and paste the text:
Save and close the text editor and rename the file to ServaAsset.inf
Be cautious to rename the file extension properly from .txt to .inf. Many times people wrongly rename the files to something like ServaAsset.inf.txt 🙂
File: INITRD_N11.2.4.GZ
Go to https://www.vercot.com/~serva/an/NonWindowsPXE3.html and scroll down to section 3.6 Ubuntu and download the file INITRD_N11.2.4.GZ (or click here, to direct link to file). This is an initial ramdisk, required for a Ubuntu to boot properly.
Copy (don’t extract) the INITRD_N11.2.4.GZ file to C:\serva_root\NWA_PXE\ubuntu\casper folder.
This step is not needed anymore.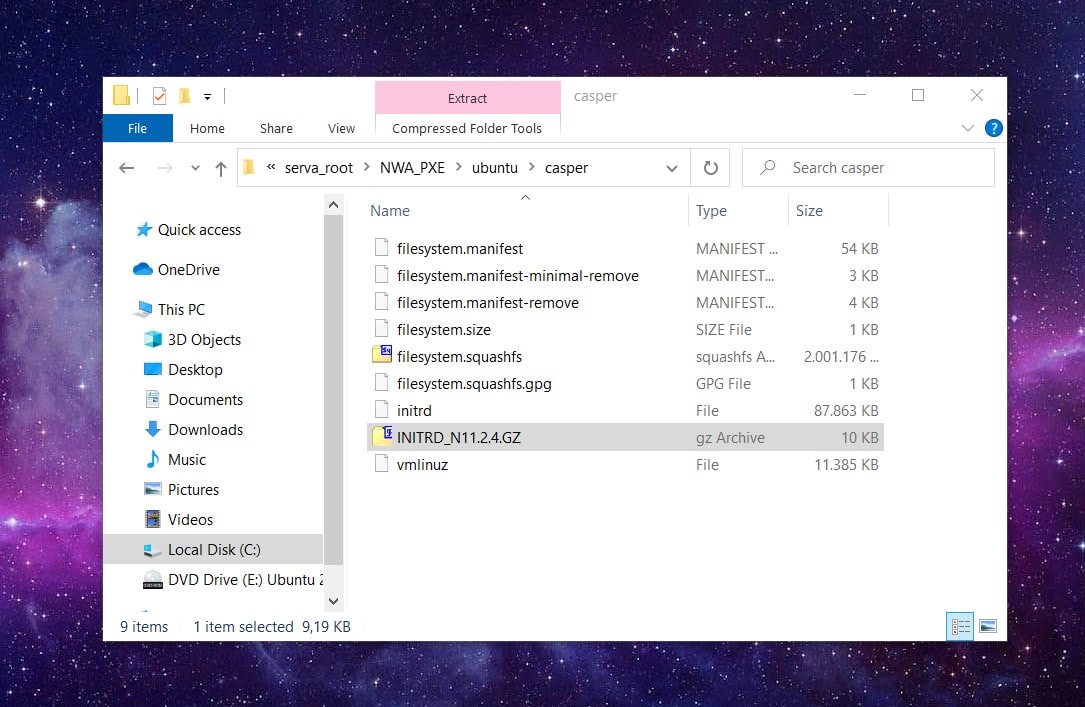
Windows: Create Username
Next thing is to create a username called serva with password avres. Click Start and write “cmd” and run Command Prompt as Administrator (right-click -> Run as administrator).
Type the following:net user serva avres /ADD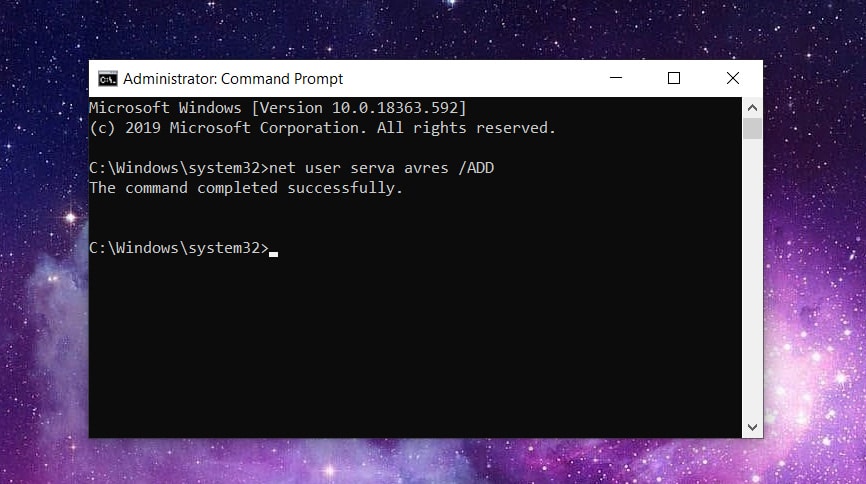
Windows: Share NWA_PXE folder
Right-click on NWA_PXE folder inside C:\serva_root and click Properties. Go to the Sharing tab and click Advanced Sharing… . Tick Share this folder, set the Share name to NWA_PXE_SHARE and click “OK” two times.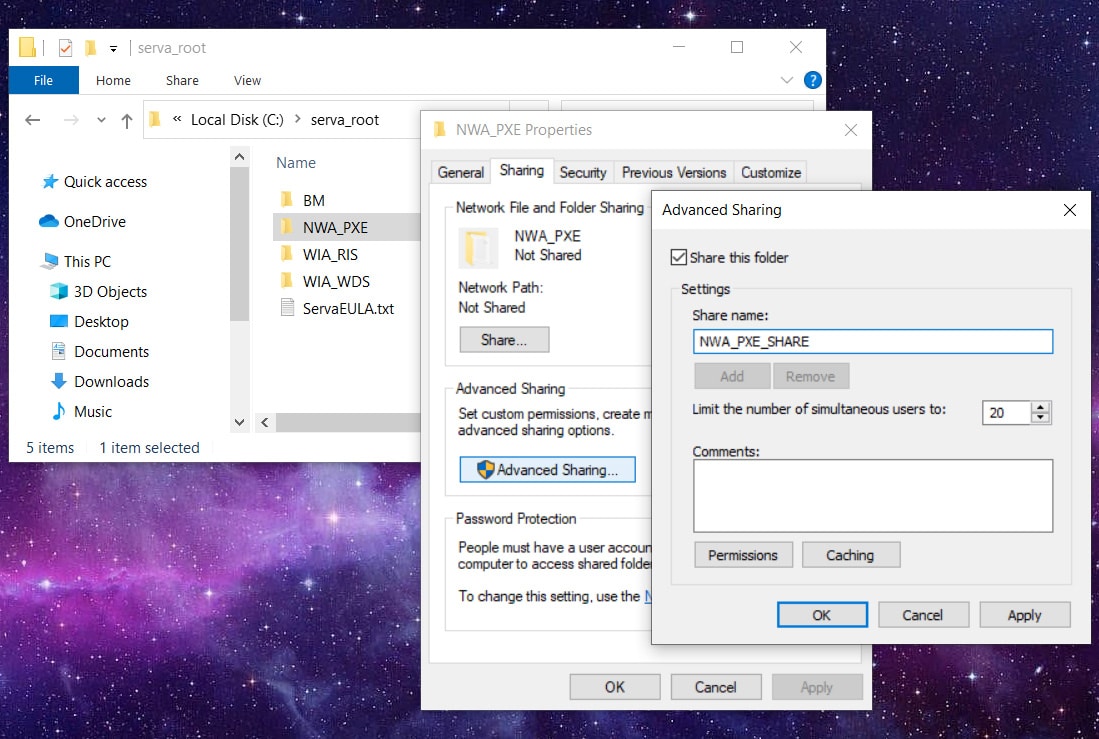
Windows: Enable SMBv1/CIFS
SMBv1/CIFS is not installed by default in Windows 10 Fall Creators Update version 1709 and up. You need to enable it.
Go to Control Panel -> Programs, click on “Turn Windows features on or off“. Tick the SMB 1.0/CIFS File Sharing Support box, click OK and restart the computer.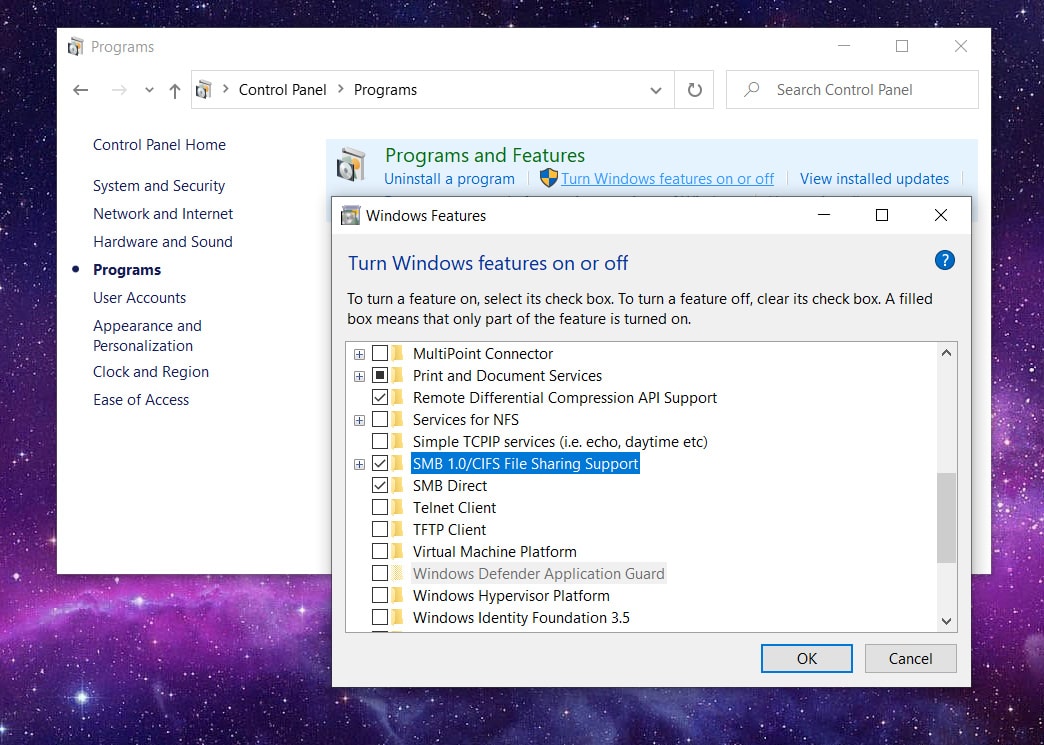
Serva: Run
Run Serva. After the countdown, you are all ready to go. Serva now listens to requests from the local network.
You may see something more in the log, that’s if Serva makes some changes when it starts. Nothing important.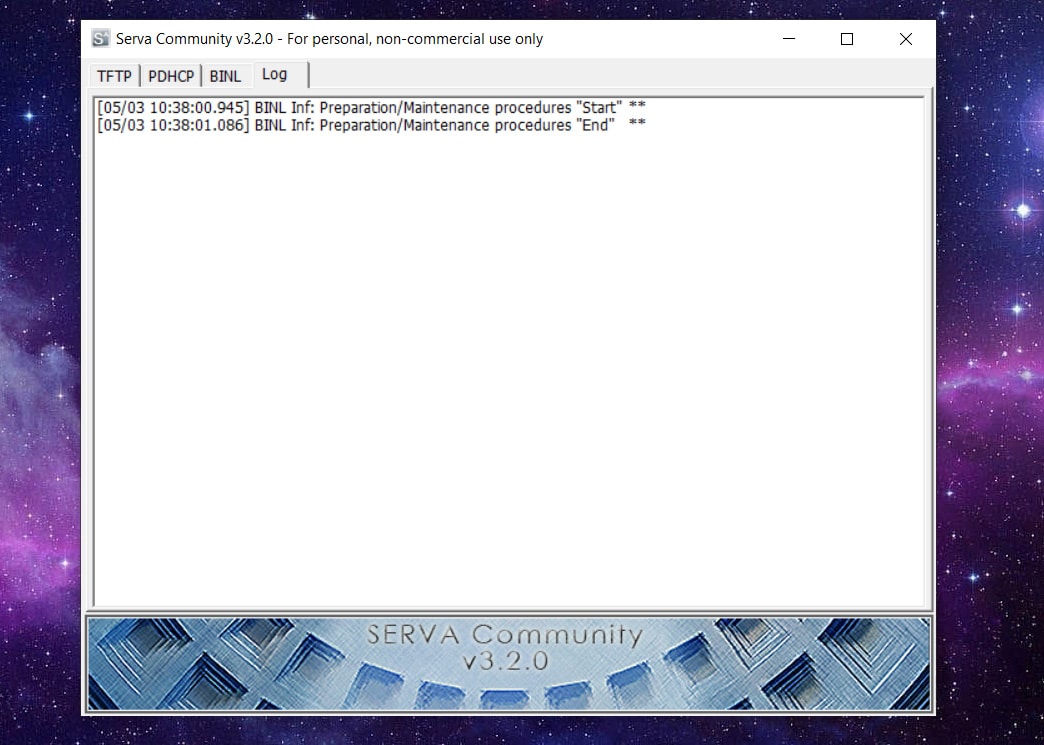
Conclusion
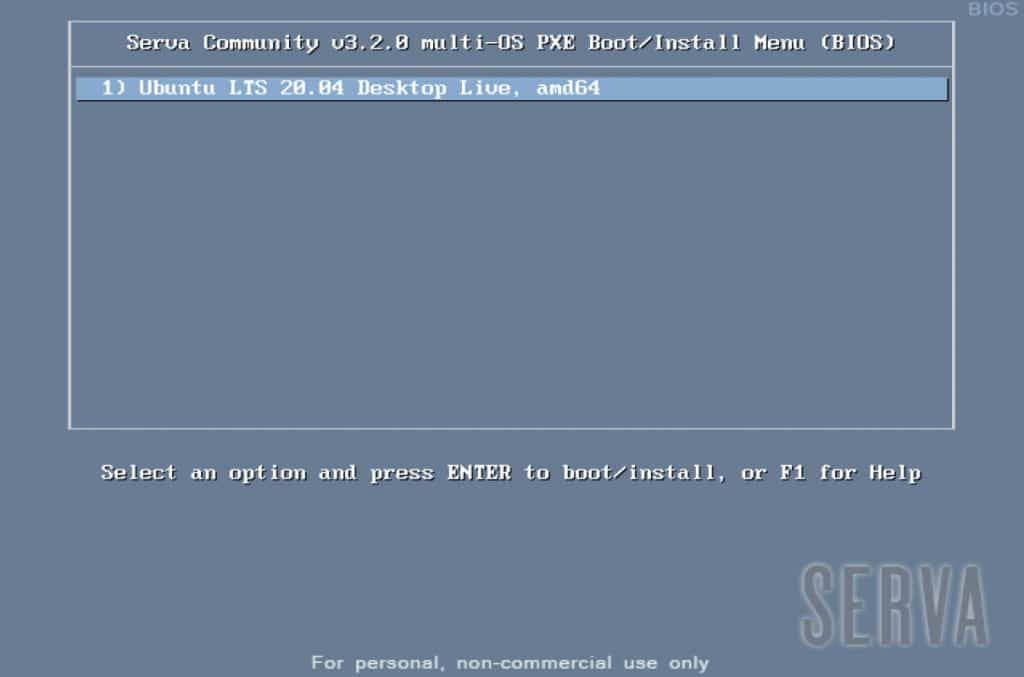
You are now ready to boot up the client machine. Make sure you enable boot up from network in the BIOS and place it to the first place in the boot order.
If you don’t know how to do it, check the manual of your motherboard or laptop. I can’t tell precisely as every motherboard, or a laptop computer has different settings and menus in BIOS.
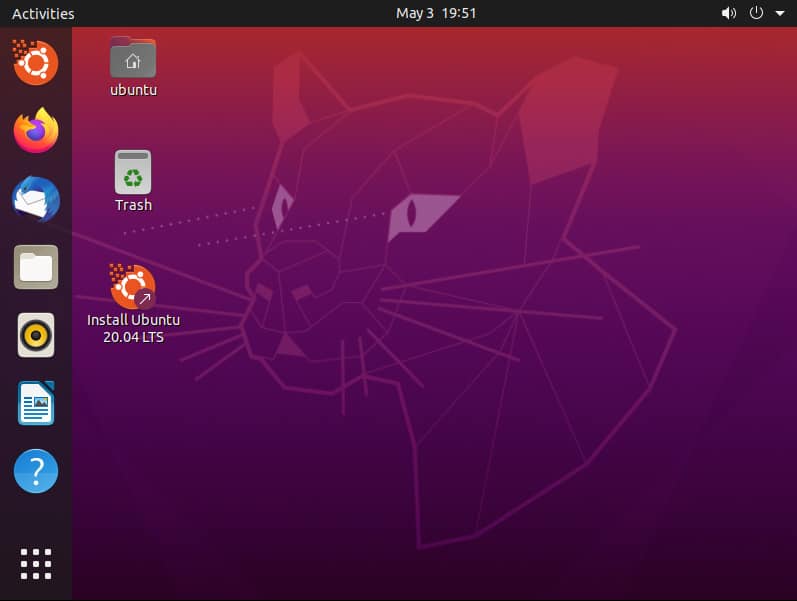
If all goes well, the Ubuntu system boots up an from there, you are on your own. 🙂
I hope this guide helps some of you. If you have any questions or a suggestion, drop a comment below.
Cheers.
Hello, I made all the steps that you comment but when is almost ready to boot the OS appear “initial menu has no label entries!”. I tried every thing and look up throught searching engines but nothing resolve this problem. Have you got any idea to resolve this issue? Thanks.
Hi.
I updated the guide with the following changes:
Step 8: Content of ServaAsset.inf file updated.
Step 9: You may skip this step.
We tested the procedure once again in our studio on different clients, it works as it should.
Considering the “Initial menu has no LABEL entries!” error: This happens when you have no ServaAsset.inf file or the file is corrupt. Make sure you copy/paste the content correctly, there must be no characters before [PXESERVA_MENU_ENTRY]
I hope it helps, and works for you.
Best Regards,
Biaggio
I tried setting it up, and found that the ramdisk was required, so I suspect that you’ve made an error in removing the step.
Hey.
From Ubuntu version 20.04, there is no need for special initial ram disk, the working one is already included inside /casper/initrd. You may check it for yourself from official Serva Non-Windows PXE page. You can scroll down to section 3.6 Ubuntu and see that every line regarding the file INITRD_N11.2.4.GZ is commented out from Ubuntu 20.04.
We tested once again, works fine without it.
I hope it helps.
Best regards,
Biaggio
I must have deleted it on accident when I was setting it up. Thank you so much for this guide though. Serva is amazing, but it’s also really complicated. The only thing I’ve been unable to do with it is booting up windows PE, to roll out images. I did everything that the official serva documentation told me to, but serva did not even notice my windows PE.
Still, having the option of various repair disks over PXE whenever something is malfunctioning is a luxury and simply amazing.
Thanks for the excellent tutorial, working good for me, without your help I don’t think
I could have got it working.
You’re welcome. I’m glad it worked.
Cheers. 🙂
Muito obrigado Biaggio!!! seu tutorial foi fantástico! agradeço muito por compartilhar com a gente. aqui deu tudo certo!!
With a little help from Google Translate, I figured out the message. 🙂
I’m glad! You’re welcome!
Cheers.
through this process I have restored my broken ubuntu pc without an USB thank you very much!
I’m happy to hear this!
Cheers.:)
You have a slight oversight. In ServaAsset.inf, you need to move “asset=name” to a new line. Otherwise, it won’t work. But. Your guide is very useful anyways! Thanks a lot
Hey.
You are correct. Thanks for pointing out the error.
Recently we switched to a different SEO plugin on the site, and now the html WordPress parser obviously doesn’t like square brackets in “how to” schemas. 🙂
Anyway, I put the code in a file so anyone can copy/paste or download it now.
Thanks again, kind regards.