How To: Boot Windows 10 Over Network PXE Using SERVA From Other Win10 Machine

Step by step tutorial how to boot and install Windows 10 over the network from other host machine running Windows 10 as well. The software used to create a PXE server is SERVA Community Edition.
After the tutorial on booting up Linux Mint over the network, I decided to write one also for Windows 10.
So here it goes …
Requirements
- Both host and client computers must be connected to the same network.
The easiest way to achieve this is to use your existing local network. So your existing (WiFi) router assigns the IP addresses, and Serva software is configured as DHCP Proxy.
The host machine where Serva is installed could be connected via WiFi. Although the wired connection is recommended. It’s faster. The client, however, must be connected via ethernet cable to the router. Obviously, it cannot connect to the WiFi before and during boot.
- Windows 10 ISO image
Head over to the official Windows 10 download site and using their Media Creation tool, download the Windows.iso file. If you’re unsure how to do it, I wrote the guide on how to Download Windows 10 ISO file with the Media Creation tool.
- SERVA Free Comunity Edition
This is a fully working free version of PXE Server software for Windows. This is for non-commercial use only, please buy a license if you use it in a professional manner. Download it from here. At the time of writing, it’s the Serva_Community_v3.2.0.
Step By Step Tutorial
Serva: Extract files
You need to extract the Serva .zip file. It doesn’t matter where. You may create a new folder named “Serva” on the Desktop and extract the .zip file into it.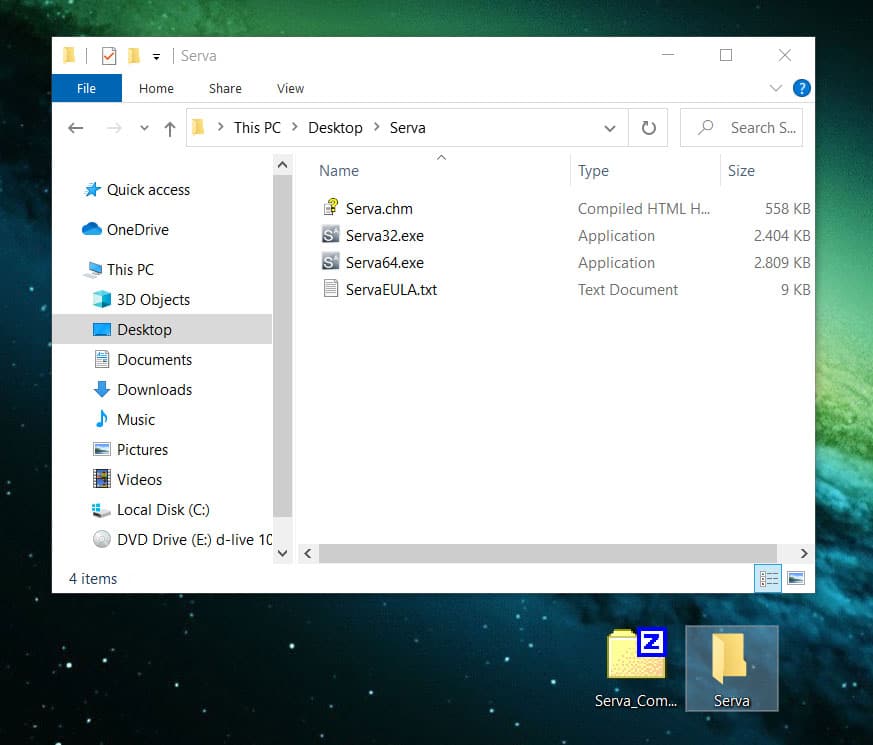
Serva: Create root folder
Create a root folder for Serva. The name and the location don’t matter, as you will point to it in the Serva settings in the next steps. For example, let’s create a folder directly on a C: drive, called “serva_root“.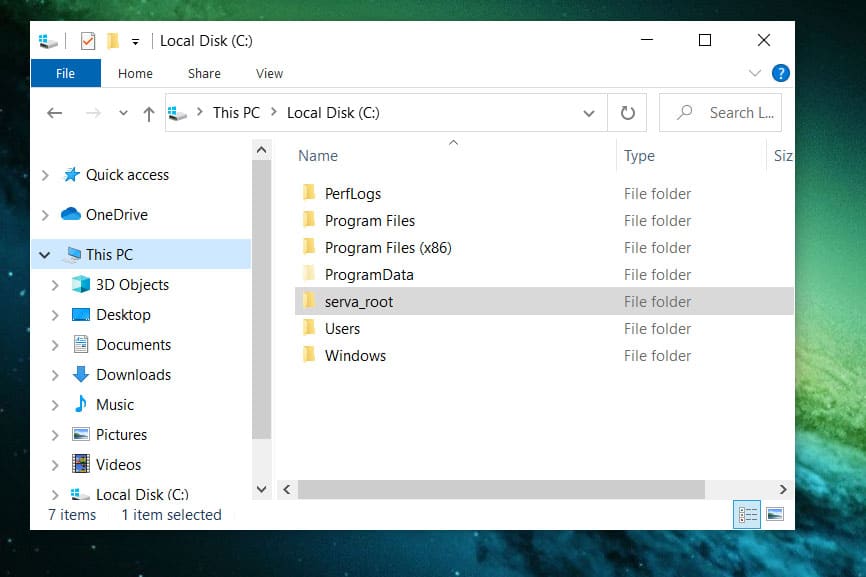
Serva: Run Serva
Run Serva64.exe (or Serva32.exe if you are on a 32-bit OS like Windows 7 32-bit). Wait for the countdown counter and click “I’m a “Community” user”. If your Windows Firewall is enabled, you get a warning. You need to ALLOW it. If you use some other 3rd party Firewall, you need to Allow Serva to access through it. Or you may just disable it for now.
Click on the icon on the top left corner and go to “Settings”.
Serva: TFTP Settings
Tick the TFTP Server box and make sure you set the Root directory to C:\serva_root folder, created previously. Leave the rest as default.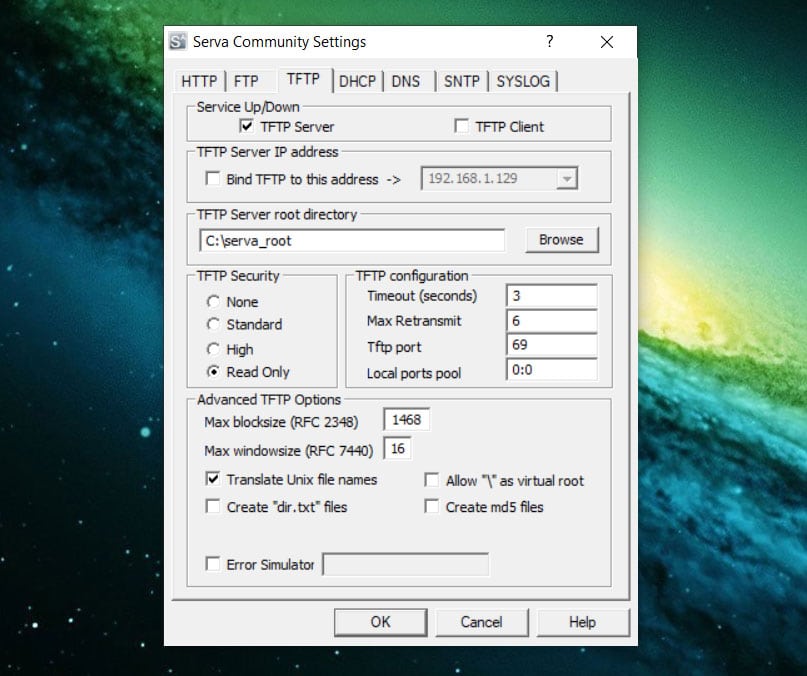
Serva: DHCP Settings
Move to the DHCP tab and tick proxyDHCP and BINL box. Leave the rest as default.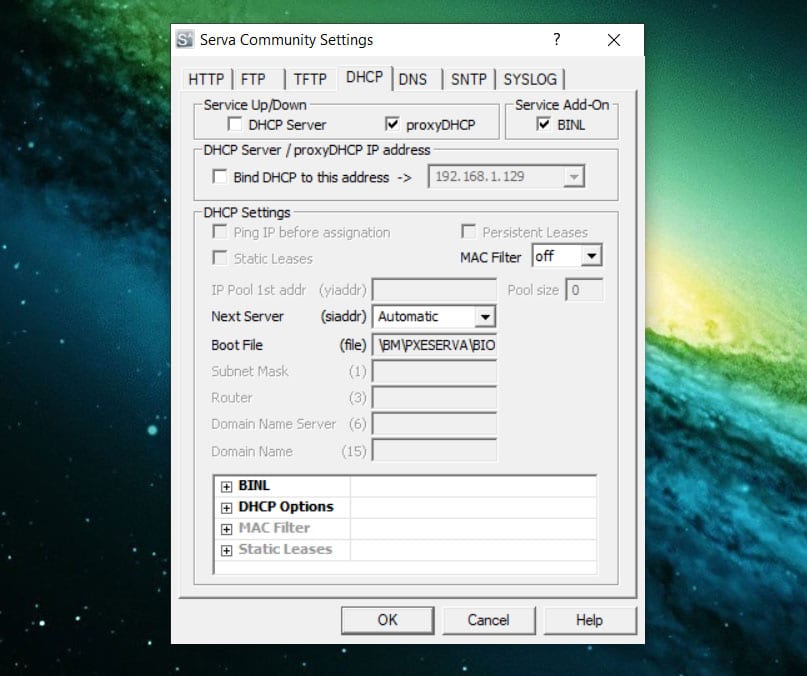
Serva: Quit and Re-run
Click OK, close Serva, and re-run it again. This is a must because only when Serva starts it generates all the necessary folders in the root folder. So if you make any changes to the folders under C:\serva_root, then you should always quit and re-run the application before a PXE boot.
After re-running it’s best to close Serva for now.
Windows ISO: Copy the Content
Inside the C:\serva_root\WIA_WDS create a new folder win10 and copy all the content from the disk image Windows.iso into it. You can mount the .iso file with Windows Explorer (right-click on the file and select “Open With -> Windows Explorer). Or with any other tool.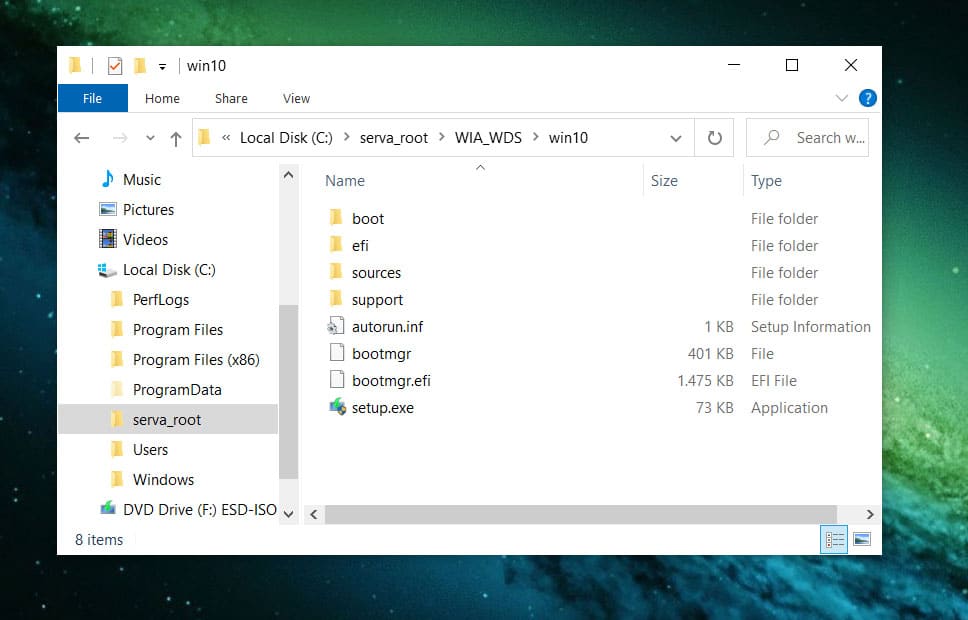
Windows: Username With a Password
It’s mandatory for a username on the Serva machine to have a password. If you already have a password set up, you are good to go. On the other hand, it’s easy to set up. You can clear it later if you prefer using your computer without a password.
Click Start and write “cmd” and run Command Prompt as Administrator (right-click -> Run as administrator).
To set up a password for a specific user, in this case, the username is aresgalaxy), run the following command. net user aresgalaxy *
(Note: the command to clear your password after the procedure, in this case for the username aresgalaxy, is: net user aresgalaxy “” )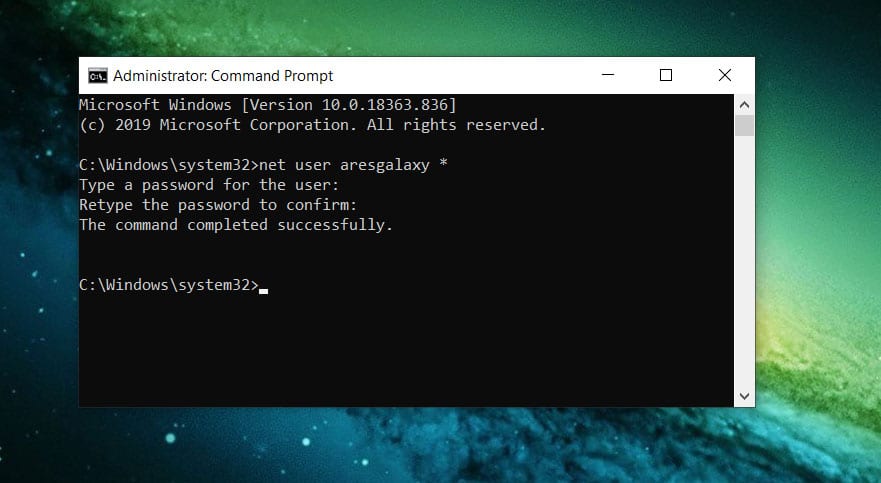
Windows: Share WIA_PXE folder
Right-click on the WIA_WDS folder inside C:\serva_root and click Properties. Go to the Sharing tab and click Advanced Sharing… . Tick Share this folder, set the Share name to WIA_WDS_SHARE and click “OK” two times.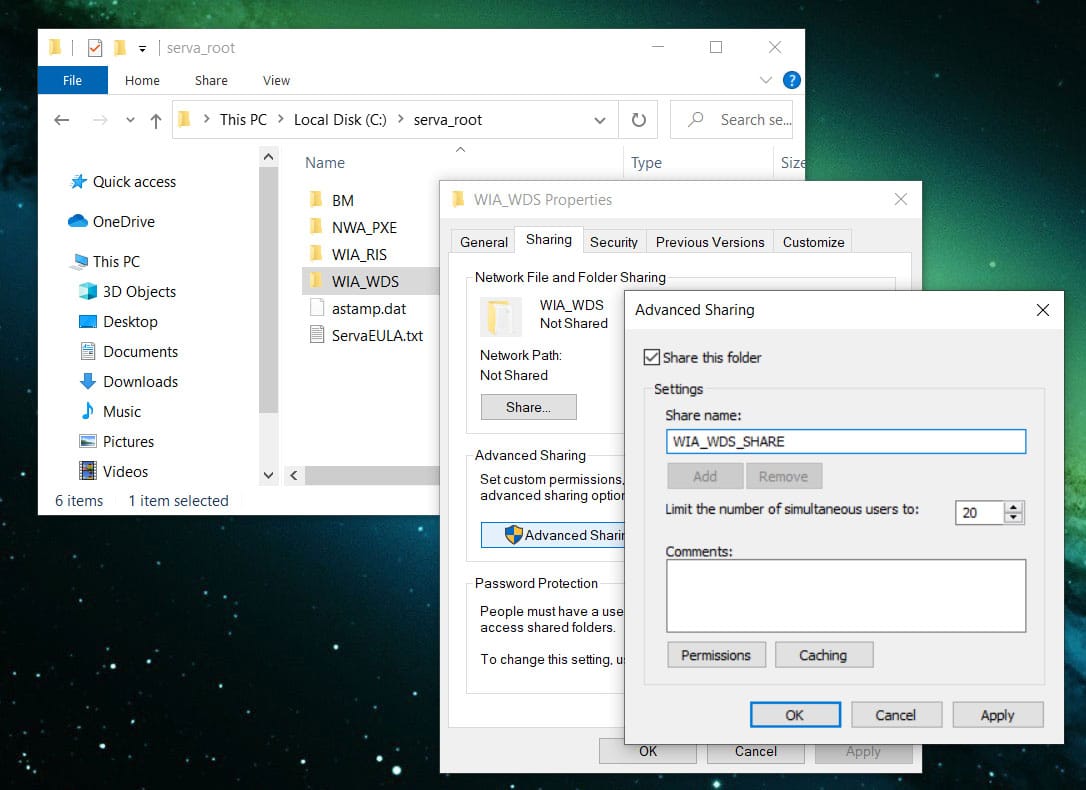
Windows: Enable SMBv1/CIFS
SMBv1/CIFS is not installed by default in Windows 10 Fall Creators Update version 1709 and up. You need to enable it.
Go to Control Panel -> Programs, click on “Turn Windows features on or off“. Tick the SMB 1.0/CIFS File Sharing Support box, click OK and restart the computer.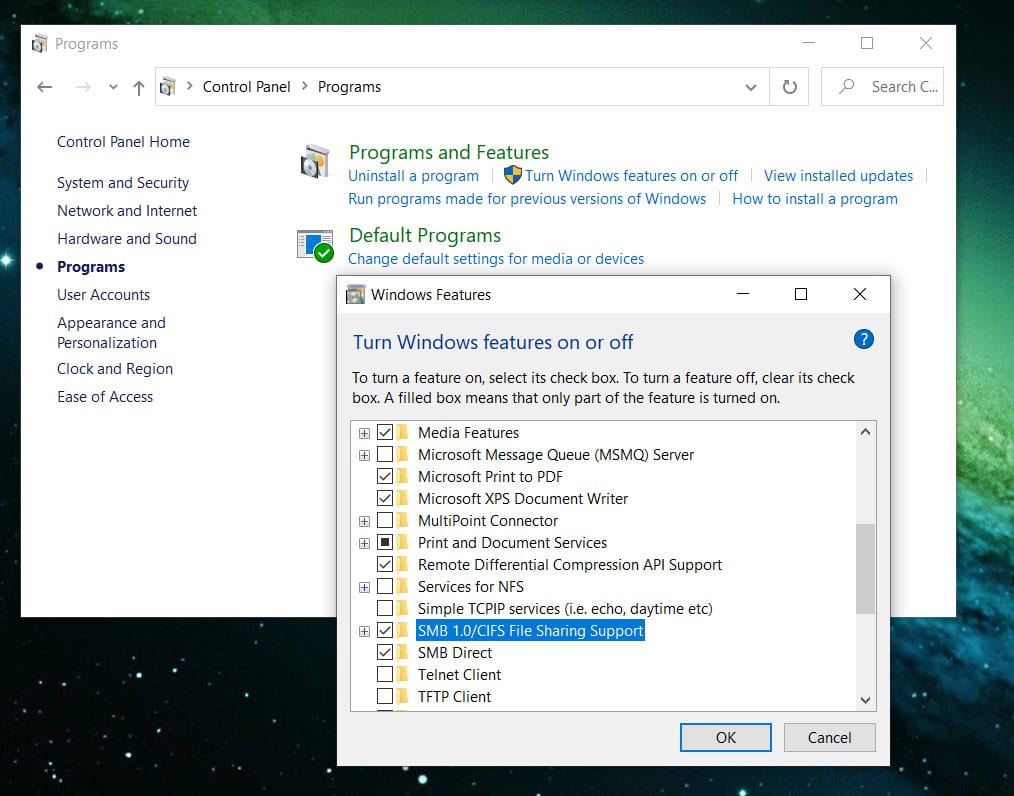
Serva: Run
Run Serva. After the countdown, you are all ready to go. Serva now listens to requests from the local network.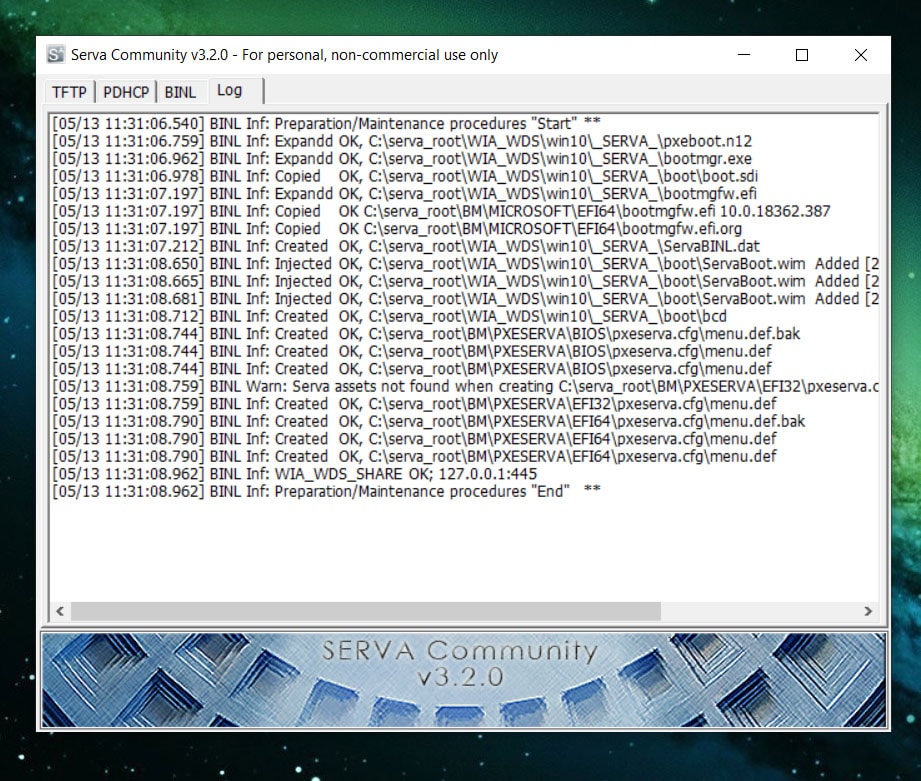
Client Machine:
You are now ready to boot up the client machine. Make sure you enable boot up from the network in the BIOS and place it in the first place in the boot order.
If you don’t know how to do it, check the manual of your motherboard or laptop, every motherboard, or a laptop computer may have different settings and menus in BIOS.
In the Install Menu, select Windows 10. After loading some installation files, enter your username and password of the host computer, where Serva is running.
Windows 10 installation appears, and from here, you are on your own :).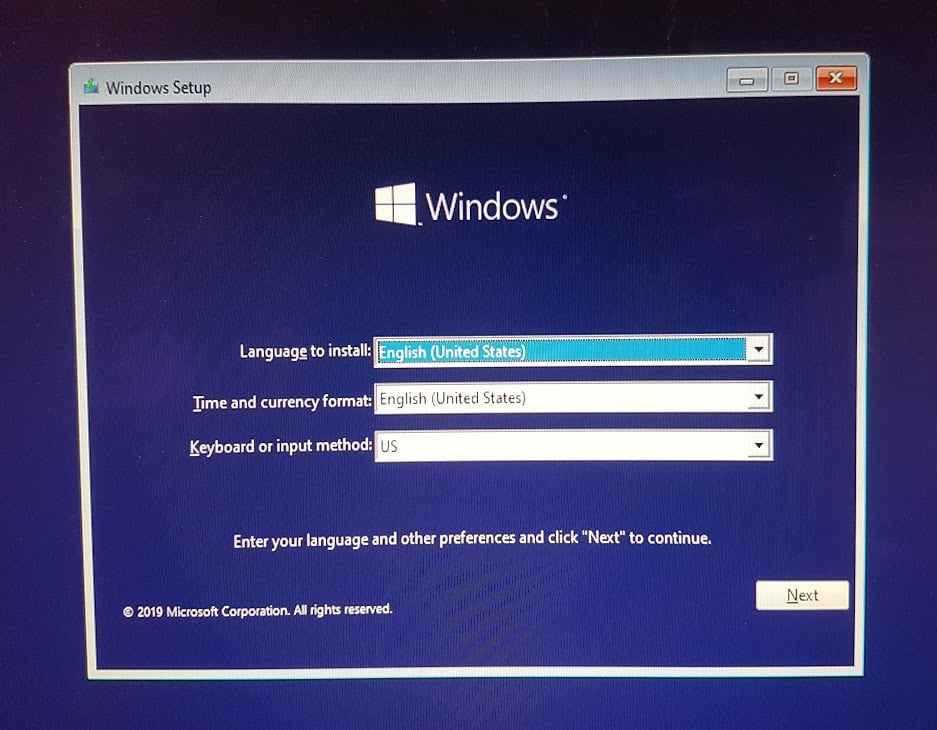
I hope this guide helps some of you. If you have any questions or a suggestion, drop a comment below.
Cheers.
This is exactly what I was looking for! The instructions are crystal clear and very well written. Thanks for spreading the knowledge!
I’m glad you found it useful! 🙂
Take care.
May God bless you if you are a believer